-1.png)
An automation (or flow) is a service script you build with blocks, like a flowchart. Example: "When someone sends their first message, send a menu; if they pick 1, ask their name; if they pick 2, hand over to a person".
Create an automation
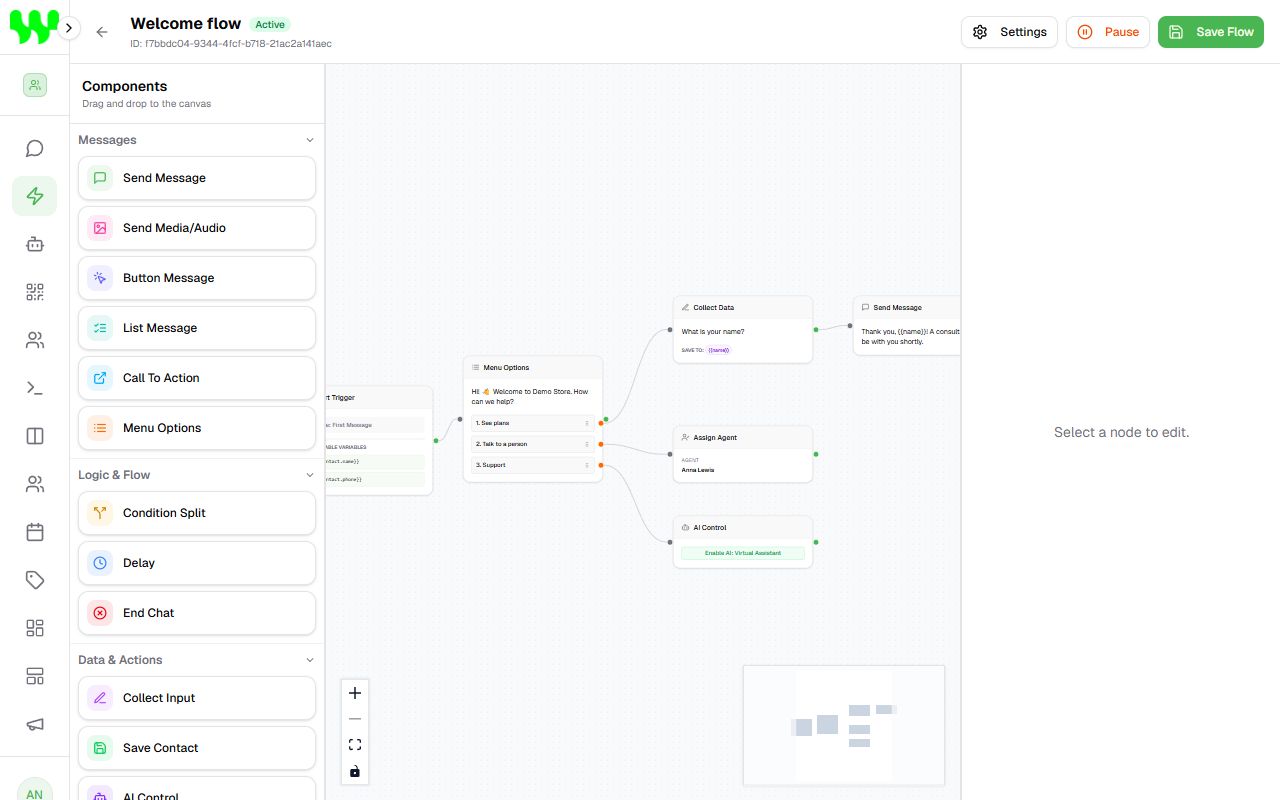
- Open Automation and click New Automation.
- Give it an Automation Name (e.g. "Welcome flow").
- Choose the Connected Instance: the WhatsApp number this flow will work on. You can leave it for later.
- Click Create Automation. The builder opens right away.
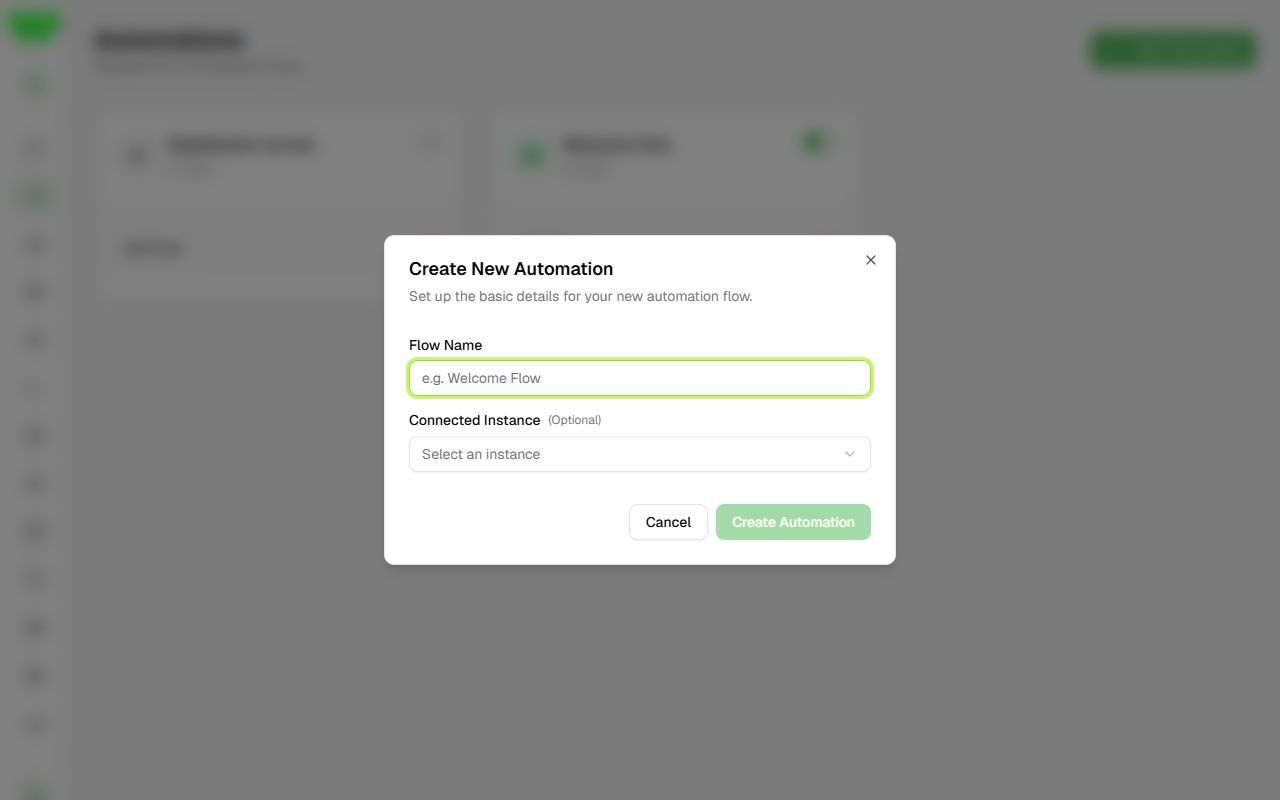
In the automation list, each card has an on/off switch, the Edit Flow button and a trash can to delete.
Using the builder
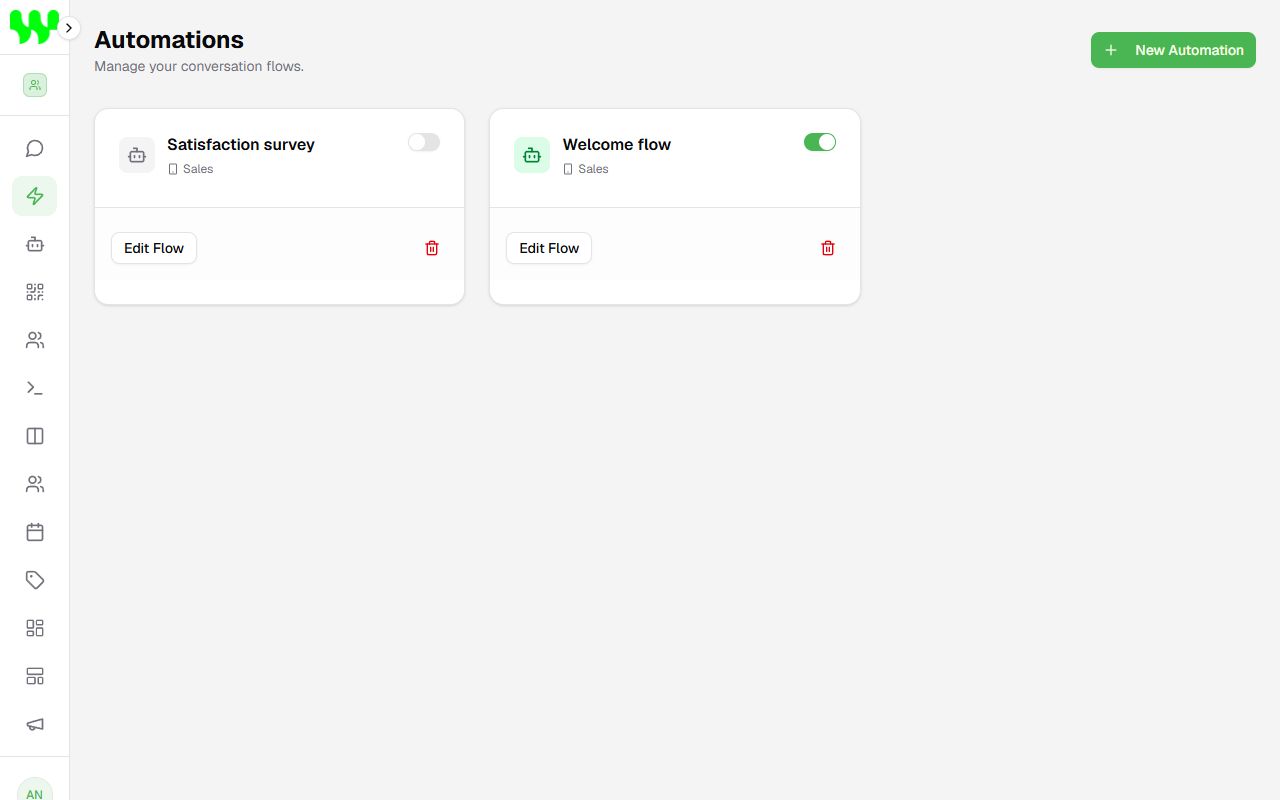
- Components (left): drag a block to the central area.
- Connect blocks: drag the dot on the right of a block to the dot on the left of the next one.
- Configure: click a block to open the Properties panel on the right. Changes are saved to the block automatically; click Save Changes if it appears.
- Remove a connection: hover over the line and click ×.
- Delete a block: select it and click Delete Component.
- Zoom: use the mouse wheel or the + / − buttons in the corner.
- At the top: Settings (name and instance), Activate / Pause and Save Flow.
Don't forget to save and activate
Click Save Flow after editing. The automation only works with Active status and an instance selected.
The start trigger
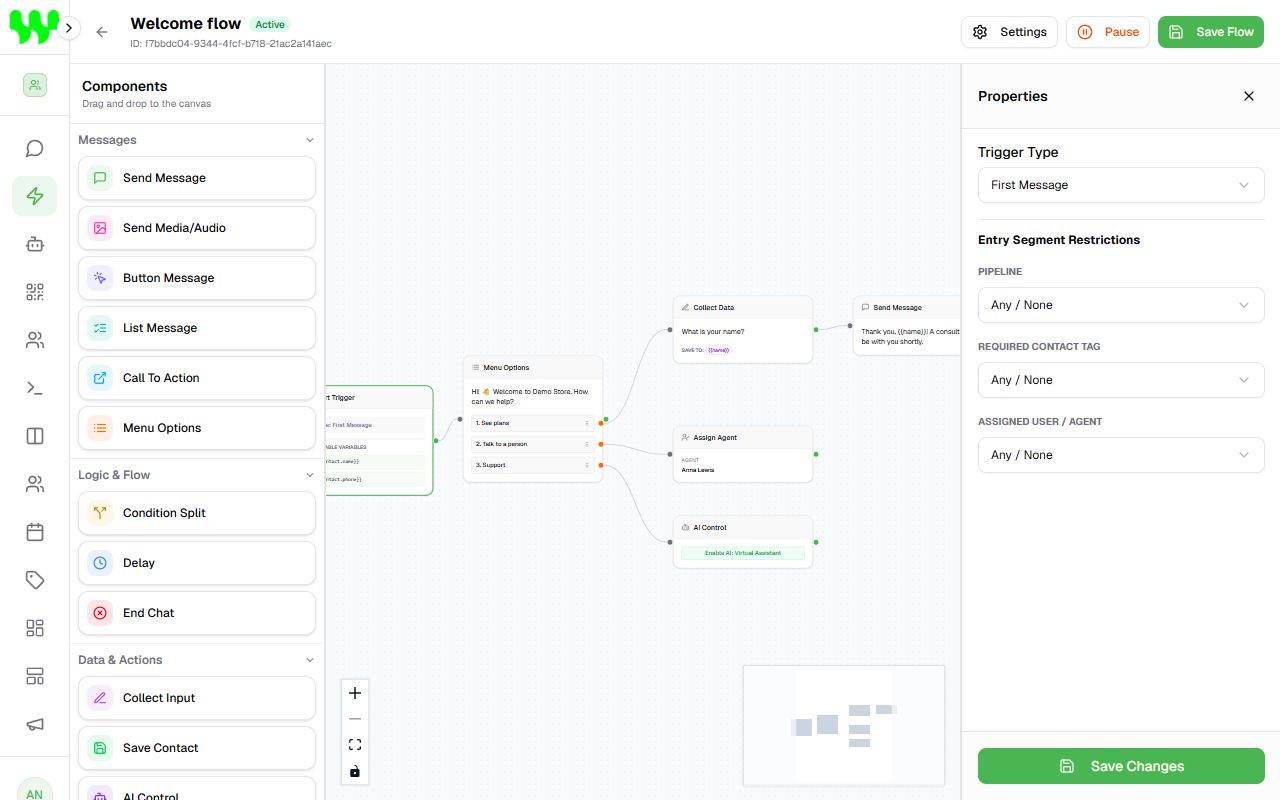
Every flow begins with the Start Trigger block. Click it to choose when the flow starts:
| Trigger type | When it fires |
|---|---|
| Message Contains | The customer's message contains one of the keywords (e.g. "price", "quote"). |
| Exact Match | The message is exactly one of the keywords (e.g. "MENU"). |
| First Message | It is the first message from a new customer. |
| Fallback (Default) | No other automation matched the message. |
| Active / Scheduled Flow | Not fired by a message: it is started by a booking (on the Schedule or in the chat, under Scheduled Flows). |
Type each keyword and press Enter to add it. Upper and lower case make no difference.
Under Entry Segment Restrictions you can limit the flow to customers in a pipeline/stage, with a required tag or with a specific assigned user.
The components
Messages
| Block | What it does |
|---|---|
| Send Message | Sends a text. Accepts variables such as {{contact.name}}. |
| Send Media/Audio | Sends an image, video, audio or document, with an optional caption. |
| Button Message | Up to 3 reply buttons. |
| List Message | A list with up to 10 options. |
| Call To Action | A message with a button that opens a link. |
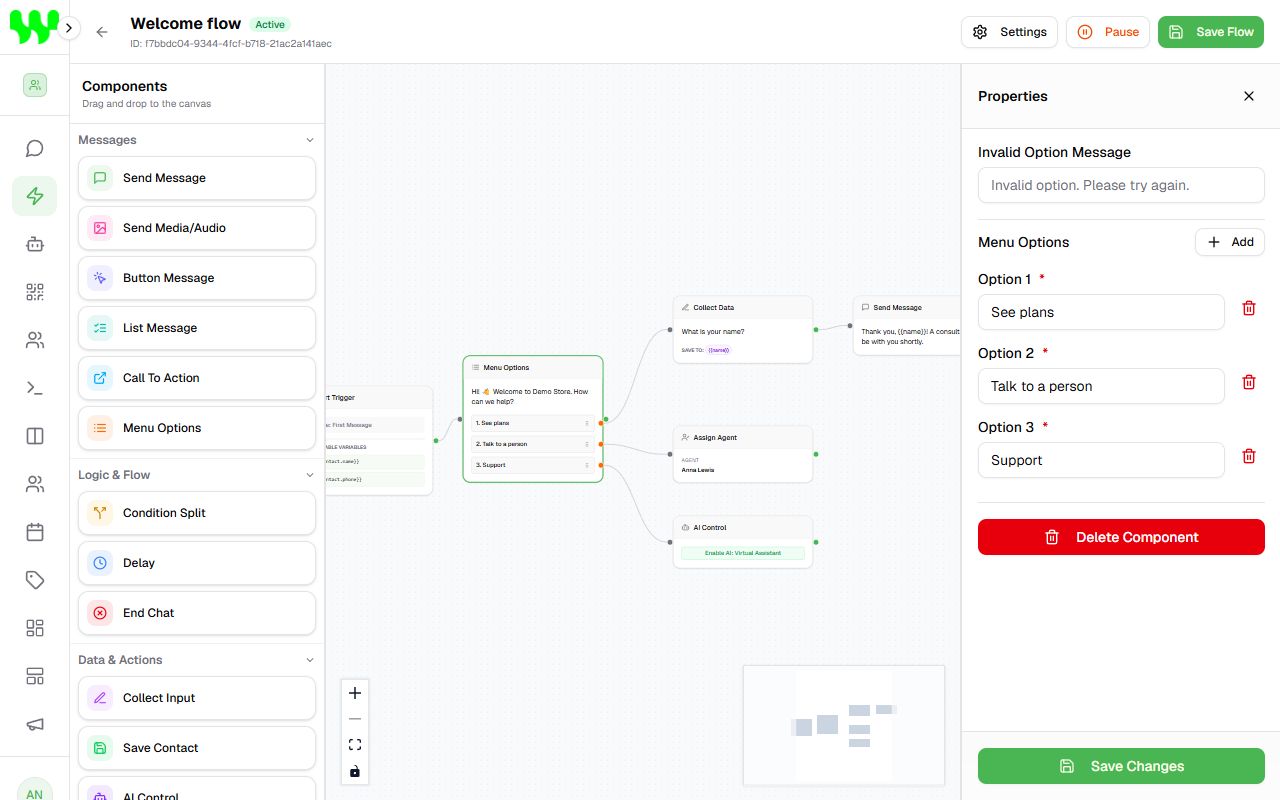
| Menu Options | A numbered menu ("1 - Sales, 2 - Support"). Each option has its own exit. The customer can reply with the number or the option text. |
Buttons and lists on WhatsApp Web
Buttons, lists and CTAs show as real buttons on the Official API. On QR code (WhatsApp Web) connections they are sent as numbered text, and the customer replies with the number.
If the customer replies with something that is not on the menu, the flow sends the Invalid Option Message and waits for a new answer.
Logic & Flow
| Block | What it does |
|---|---|
| Condition Split | Creates different paths ("IF... ELSE"). Types: Time (24h) (e.g. outside business hours), Message Text, Number Message, Variable Check (whether a variable has a value) and Time since previous message. Operators: equals, not equals, contains, starts/ends with, greater, less, between. If no condition matches, it follows the Else (Default Path). |
| Delay | Waits a few seconds before the next block (makes the chat feel more natural). |
| End Chat | Ends the automation for this customer. |
Data & Actions
| Block | What it does |
|---|---|
| Collect Input | Asks a question and stores the answer in a variable (e.g. name). Use it later as {{name}}. |
| Save Contact | Creates/updates the contact in the CRM: name (from a variable), owner, pipeline/stage, tag and custom fields. |
| AI Control | Enable AI (choosing the agent) or Disable (Pause) AI in this chat. Great for handing over to the AI after the menu. |
| API Call | Sends data to another system (URL, method, headers and body in JSON) and stores parts of the response in variables. For advanced users. |
| Set Tag | Adds or removes a tag on the contact. |
| Pipeline Stage | Moves the contact to a pipeline/stage. |
| Assign Agent | Sets the team member responsible for the contact. |
Scheduling
| Block | What it does |
|---|---|
| Availability Check | Checks the Schedule: whether a date/time is free, or suggests the next available days, respecting weekdays, business hours, conflicts and blocked days. It has two exits: available and full. It can save the results to variables. |
| Create Appointment | Creates the appointment on the schedule (title, date, time and notes — they can come from collected variables). |
Variables
Variables store information during the chat and can be used in any text with double braces:
{{contact.name}}— the contact's name.{{contact.phone}}— the contact's phone.- Any variable created by Collect Input, API Call or Availability Check (e.g.
{{name}},{{email}}).
Example: "Thank you, {{name}}! A consultant will be with you shortly."
Example: welcome flow
- Start Trigger with First Message.
- Menu Options: "Hi! How can we help? 1 - See plans, 2 - Talk to a person, 3 - Support".
- Option 1 → Collect Input ("What is your name?" → variable
name) → Send Message ("Thank you,{{name}}!"). - Option 2 → Assign Agent (a salesperson).
- Option 3 → AI Control (enable the support agent).
- Save Flow and Activate.
Which comes first: automation or AI?
When a message arrives, the system first checks the active automations of the same instance. If the customer is already in the middle of a flow, the flow continues. If no automation answered, the AI Agent takes over.
To take a customer out of a flow manually, use the ⚡ End Automation Session button in the chat.
Common problems
- The flow doesn't fire: check that it is Active, has an instance selected, the trigger and keywords are right and the entry restrictions are not excluding the customer.
- The customer got "stuck" in the menu: they may be answering something outside the options. End the session in the chat or add a "Talk to a person" option.
More in Troubleshooting.